BlogVerse and its setup
My First Blog
This is my first blog. So…Hello!
What is BlogVerse
BlogVerse is my personal blogging website where I publish my blogs. This is a sync between Obsidian, Hugo and GitHub Pages.
What we need (for Windows)?
We need:
- Obsidian (of course, where we will be writing our posts)
- Go (Golang. A language used for Hugo)
- Git (for a Sync between GitHub and our posts)
- Hugo (A static website generator which comes with many themes…)
- Python (obviously a legend)
- PowerShell (I am Windows geek. Not safe, I know!)
If you don’t understand anything, use my own GitHub Repository, Stack Overflow, or any LLM model.
My GitHub Repo: https://github.com/mrunalnshah/BlogVerse
LET US BEGIN…
Step 0: Installing Go, Git, Hugo, Python
Only for Windows! (I can’t afford MacOS, and Linux sure… but no.)
- Go: https://go.dev/doc/install
- Hugo:
winget install Hugo.Hugo.Extendedor download from here: https://gohugo.io/installation/windows/ (If you manually download, you may want to add environment path) - Git: https://git-scm.com/
- Python: https://www.python.org/downloads/
Step 1: Install and Setup Obsidian
Once we install Obsidian, open it and then:
- Create a Vault named
BlogVerseat a location where you want to keep all your posts. - Create a folder inside the
BlogVersevault namingposts(you can name it anything btw). - Inside the
BlogVerse/posts/create a folder namedimages(to store images). - Inside
BlogVerse/postscreate your first post. (maybe copy this post, because why not?) - Congratulations you have written your first post, and this is where you write your posts.
Step 2: Create a Hugo Instance and Push it to GitHub
Step 2.1 Create Hugo Instance
This step is going to be your website made by hugo:
- Create a folder named
BlogVerse(yeah everything needs to be namedBlogVerse) at a location where you want your website to exists. (NOT REQUIRED as hugo makes it’s own new folder) - Open the terminal inside the folder
BlogVerse\and run this command:hugo new site BlogVerse. (This will create a new hugo instance in a folder namedBlogVerse). - Create a
postsfolder insideBlogVerse\content\ - Create a
imagesfolder insideBlogVerse\static\ - Your website is ready to go? (NOT yet! we need a very beautiful theme)
Step 2.2 Use a theme from Hugo themes
Thanks to active community, we get use-and-run themes for ourselves which are highly customizable. Here is the website: https://themes.gohugo.io/
- Select any theme you like. I choose
Archie. Website: https://themes.gohugo.io/themes/archie/ - Click on Download, and follow steps. (Yeah, your theme may have different steps.)
- Let’s follow the steps in
Archietheme- Step 1: go to
themesfolder - Step 2: Run this command
git clone https://github.com/athul/archie.git - Step 3: You will find a
Config of the Demo Siteor anythingConfig, Copy and Replace it into yourBlogVerse\hugo.toml. (MOST REQUIRED)
- Step 1: go to
- Now you have a theme ready.
Step 2.3 Push everything to GitHub
It’s a controversial step, people would say first create a setup to first copy the posts from Obsidian path to the Hugo website. I would say, whatever.
- Just open
GitHub Desktop. (You can do it using command line, but I prefer GitHub Desktop where i don’t need to use command line). - Click on
Files > Add local repository... - Add the SITENAME and create a new Repo.
- DONE!!!
Why this is better? It removes the requirement for us to generate a SSH key required to give access to GitHub. GitHub Desktop does everything by itself.
Step 3: Create an automation mechanism
Here, We are going to write a python script, and a command line to copy files and all data attached to the website. The Python script will then replace the existing image path with respective website path so we can show images in our webpages.
- Use the robocopy function to copy the whole folder in our
BlogVerse\poststo ourSITENAME\content\posts:
robocopy "PATH-TO-YOUR-OBSIDIAN-BLOG-POSTS-FOLDER" "PATH-TO-HUGO-SITENAME\content\posts" /mir
For Example:
robocopy "C:\Users\mrunalnshah\Documents\BlogVerse\posts" "C:\Users\mrunalnshah\BlogVerse\content\posts" /mir
This will copy all the files to your website.
- Use the python code to replace the image links from your blog post to match it with new location where your website images will be stored.
import os
import re
import shutil
# Paths (using raw strings to handle Windows backslashes correctly)
posts_dir = r"PATH-TO-HUGO-SITENAME\content\posts"
attachments_dir = r"PATH-TO-HUGO-SITENAME\content\posts\images"
static_images_dir = r"PATH-TO-HUGO-SITENAME\static\images"
# Step 1: Process each markdown file in the posts directory
for filename in os.listdir(posts_dir):
if filename.endswith(".md"):
filepath = os.path.join(posts_dir, filename)
with open(filepath, "r", encoding="utf-8") as file:
content = file.read()
# Step 2: Find all image links in the format 
images = re.findall(r'\[\[([^]]*\.png)\]\]', content)
# Step 3: Replace image links and ensure URLs are correctly formatted
for image in images:
# Prepare the Markdown-compatible link with %20 replacing spaces
markdown_image = f"})"
content = content.replace(f"[[{image}]]", markdown_image)
# Step 4: Copy the image to the Hugo static/images directory if it exist
image_source = os.path.join(attachments_dir, image)
if os.path.exists(image_source):
shutil.copy(image_source, static_images_dir)
# Step 5: Write the updated content back to the markdown file
with open(filepath, "w", encoding="utf-8") as file:
file.write(content)
print("Markdown files processed and images copied successfully.")
DONE!!!!.
Step 4: RUN
- Write a post in Obsidian, add images to image folder.
- Run Robocopy cmd
- Run Python script.
- Check if your static/images contains the images? If yes, you are ready to go.
- If the images don’t show up, double-check the paths and configuration. (Use: 🧠)
Step 5: Before compiling Hugo Site
If you are using GitHub Pages for your publishing, and you gonna use it not as your main website like mrunalnshah.github.io rather you gonna use mrunalnshah.github.io/BlogVerse. Follow me:
- Open
SITENAME\hugo.tomland add the script above the file (don’t delete anything, just copy this on top of the file)
Change Required:
baseURL = "https://mrunalnshah.github.io/BlogVerse/"
relativeURLs = false
canonifyURLs = true

[caches]
  [caches.images]
    dir = ':cacheDir/images'
This is going to link your BlogVerse or anything you named it, and will generate a new website with images linked.
- Go to
SITENAME/.github/workflow, and create a new file namedhugo.ymland paste the content in there:
name: Build and deploy
on:
  push:
    branches:
      - main
  workflow_dispatch:
permissions:
  contents: read
  pages: write
  id-token: write
concurrency:
  group: pages
  cancel-in-progress: false
defaults:
  run:
    shell: bash
jobs:
  build:
    runs-on: ubuntu-latest
    env:
      DART_SASS_VERSION: 1.97.1
      GO_VERSION: 1.25.5
      HUGO_VERSION: 0.154.2
      NODE_VERSION: 24.12.0
      TZ: Europe/Oslo
    steps:
      - name: Checkout
        uses: actions/checkout@v5
        with:
          # submodules: recursive
          fetch-depth: 0
      - name: Setup Go
        uses: actions/setup-go@v5
        with:
          go-version: ${{ env.GO_VERSION }}
          cache: false
      - name: Setup Node.js
        uses: actions/setup-node@v4
        with:
          node-version: ${{ env.NODE_VERSION }}
      - name: Setup Pages
        id: pages
        uses: actions/configure-pages@v5
      - name: Create directory for user-specific executable files
        run: |
          mkdir -p "${HOME}/.local"
      - name: Install Dart Sass
        run: |
          curl -sLJO "https://github.com/sass/dart-sass/releases/download/${DART_SASS_VERSION}/dart-sass-${DART_SASS_VERSION}-linux-x64.tar.gz"
          tar -C "${HOME}/.local" -xf "dart-sass-${DART_SASS_VERSION}-linux-x64.tar.gz"
          rm "dart-sass-${DART_SASS_VERSION}-linux-x64.tar.gz"
          echo "${HOME}/.local/dart-sass" >> "${GITHUB_PATH}"
      - name: Install Hugo
        run: |
          curl -sLJO "https://github.com/gohugoio/hugo/releases/download/v${HUGO_VERSION}/hugo_extended_${HUGO_VERSION}_linux-amd64.tar.gz"
          mkdir "${HOME}/.local/hugo"
          tar -C "${HOME}/.local/hugo" -xf "hugo_extended_${HUGO_VERSION}_linux-amd64.tar.gz"
          rm "hugo_extended_${HUGO_VERSION}_linux-amd64.tar.gz"
          echo "${HOME}/.local/hugo" >> "${GITHUB_PATH}"
      - name: Verify installations
        run: |
          echo "Dart Sass: $(sass --version)"
          echo "Go: $(go version)"
          echo "Hugo: $(hugo version)"
          echo "Node.js: $(node --version)"
      - name: Install Node.js dependencies
        run: |
          [[ -f package-lock.json || -f npm-shrinkwrap.json ]] && npm ci || true
      - name: Configure Git
        run: |
          git config core.quotepath false
      - name: Cache restore
        id: cache-restore
        uses: actions/cache/restore@v4
        with:
          path: ${{ runner.temp }}/hugo_cache
          key: hugo-${{ github.run_id }}
          restore-keys:
            hugo-
      - name: Build the site
        run: |
          hugo \
            --gc \
            --minify \
            --baseURL "${{ steps.pages.outputs.base_url }}/" \
            --cacheDir "${{ runner.temp }}/hugo_cache"
      - name: Cache save
        id: cache-save
        uses: actions/cache/save@v4
        with:
          path: ${{ runner.temp }}/hugo_cache
          key: ${{ steps.cache-restore.outputs.cache-primary-key }}
      - name: Upload artifact
        uses: actions/upload-pages-artifact@v3
        with:
          path: ./public
  deploy:
    environment:
      name: github-pages
      url: ${{ steps.deployment.outputs.page_url }}
    runs-on: ubuntu-latest
    needs: build
    steps:
      - name: Deploy to GitHub Pages
        id: deployment
        uses: actions/deploy-pages@v4
Don’t uncomment yet, but in case if things don’t work, try uncommenting this one line in hugo.yml
      - name: Checkout
        uses: actions/checkout@v5
        with:
          # submodules: recursive <----- UNCOMMENT
          fetch-depth: 0
Also just in case, Cross-check your BlogVerse\.github\workflow\static.yml with mine (Optional):
  # Simple workflow for deploying static content to GitHub Pages
  name: Deploy static content to Pages

  on:
    # Runs on pushes targeting the default branch
    push:
      branches: ["pages"]

    # Allows you to run this workflow manually from the Actions tab
    workflow_dispatch:

  # Sets permissions of the GITHUB_TOKEN to allow deployment to GitHub Pages
  permissions:
    contents: read
    pages: write
    id-token: write

  # Allow only one concurrent deployment, skipping runs queued between the run in-progress and latest queued.
  # However, do NOT cancel in-progress runs as we want to allow these production deployments to complete.
  concurrency:
    group: "pages"
    cancel-in-progress: false

  jobs:
    # Single deploy job since we're just deploying
    deploy:
      environment:
        name: github-pages
        url: ${{ steps.deployment.outputs.page_url }}
      runs-on: ubuntu-latest
      steps:
        - name: Checkout
          uses: actions/checkout@v4
        - name: Setup Pages
          uses: actions/configure-pages@v5
        - name: Upload artifact
          uses: actions/upload-pages-artifact@v3
          with:
            # Upload entire repository
            path: '.'
        - name: Deploy to GitHub Pages
          id: deployment
          uses: actions/deploy-pages@v4
DONE!!!
Step 6: Build with Hugo:
- Use This command to run the hugo website always:
Change Required!
hugo --gc --minify --baseURL "https://mrunalnshah.github.io/BlogVerse/"
- You can see a new “local” server is also made, you can check it.
Step 7: Open GitHub Account on Browser
- Go to your repository we created for hosting website
BlogVerse(in my case!) - Go to
Settings > Pages > Build and deployment - In
Source, SelectGitHub Actions - DONE!!!
Step 8: Push
Open GitHub Desktop and Push the code to the repository. After pushing, you need to wait for seconds or minutes (Hugo is fast, so won’t take a lot of time). You can open the GitHub Repository and see the process.
Check status here: pending
!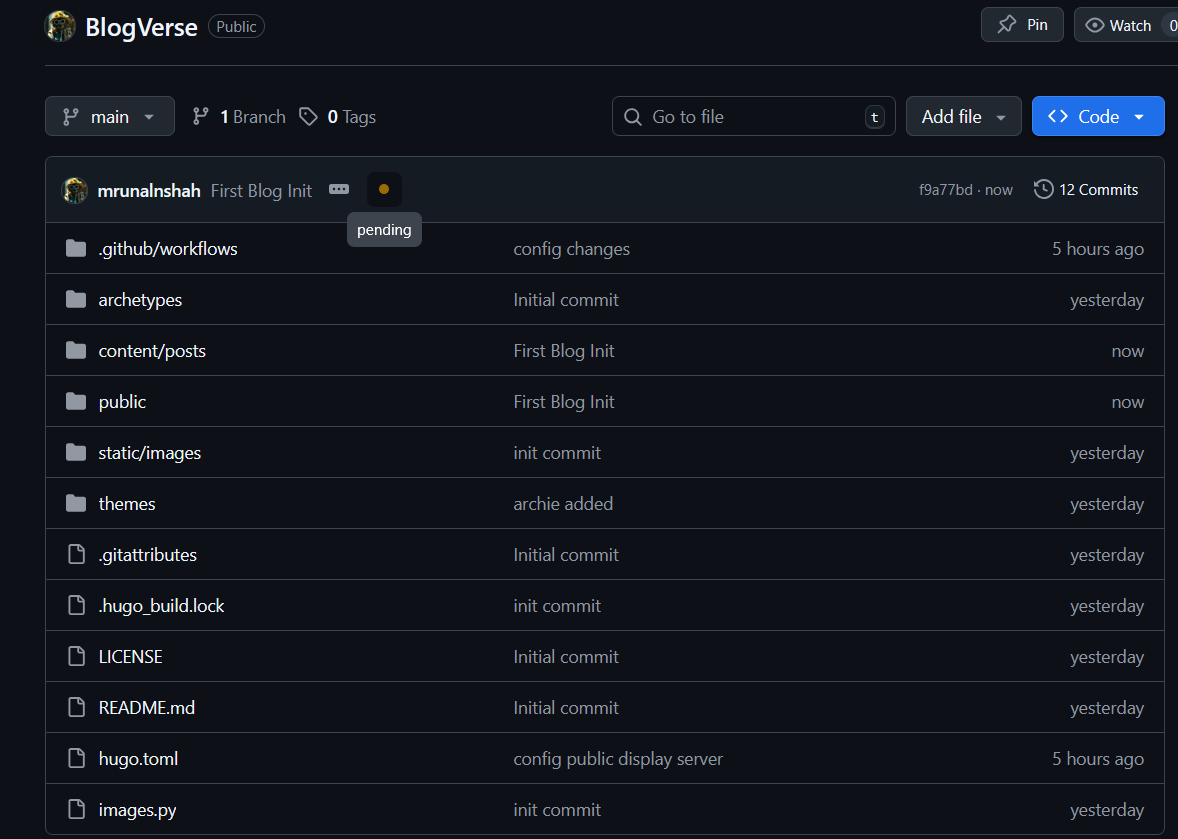
Once done. You will be able to access your BlogVerse at https://mrunalnshah.github.io/BlogVerse. (obviously change your username and repo name)
Step 9: What you need to do after every step?
So you do need to use:
robocopy "PATH-TO-YOUR-OBSIDIAN-BLOG-POSTS-FOLDER" "PATH-TO-HUGO-SITENAME\content\posts" /mir- python script
hugo --gc --minify --baseURL "https://mrunalnshah.github.io/BlogVerse/"- Push to GitHub Repo using GitHub Desktop (1 click action)
Your post will be deployed on your website like mrunalnshah.github.io/BlogVerse/
Thanks to PowerShell, we can automate.
I have written a script for Windows. For this script to run, you need a to copy this script into a file named push.ps1 which should be stored at your PATH-TO-HUGO-SITE-DIRECTORY, where we stored images.py.
#!/usr/bin/env pwsh
$ErrorActionPreference = "stop"

Write-Host "Building BlogVerse..."

# Detect os
$IsWindows = $env:OS -eq "Windows_NT"

if ($IsWindows) {
	Write-Host "Detected Windows"

	# Change Path Here
	$SrcPost = "C:\Users\mruna\Documents\Learnaholic\Blogs & Posts\posts"
	$DstPost = "C:\Users\mruna\Documents\Portfolio\BlogVerse\content\posts"

	Write-Host "Syncing posts & images with robocopy..."
	robocopy "$SrcPost" "$DstPost" /mir | Out-Null
} else {
	Write-Error "Unsupported operating system"
}

Write-Host "Running Image processing..."
python images.py

Write-Host "Building Hugo Site"
hugo --gc --minify --baseURL "https://mrunalnshah.github.io/BlogVerse/"

Write-Host "Done!"
You just need to run this script, and push the code from GitHub Desktop. (I used the script to push this update!)
Bonus Step: Get yourself on Google Search
- Go to: https://search.google.com/search-console/about
- Click
Start now - Click
Add property > URL prefix - Enter:
https://mrunalnshah.github.io/BlogVerse/ - It will generate a file, download that file and copy it into your Hugo website path
BlogVerse/public/. Just like below:public/ ├── index.html ├── sitemap.xml ├── google123abc456def.html ✅ - Push the code to GitHub.
- Go back to the previous website to click
verify. - Done!
Thanks and all hail open source,
Mrunal Nirajkumar Shah.